
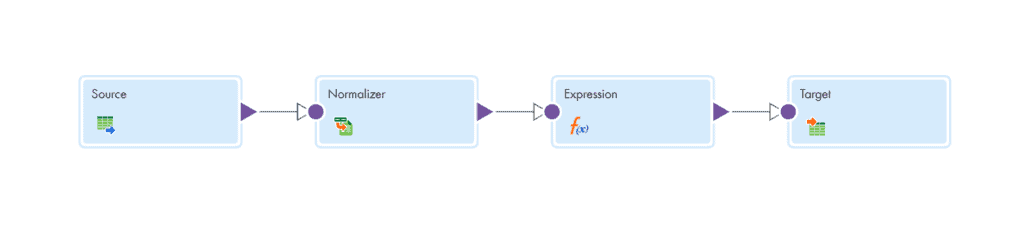
1. Normalizer Transformation
Normalizer transformation is an active and connected transformation in Informatica Cloud(IICS). It transforms one incoming row that contains multiple-occurring data into multiple output rows, one row for each instance of multiple-occurring data.
The Normalizer transformation is best understood with an example.
Source Data:
Below is the student’s marks data for various subjects
| Student Name | Maths | Physics | Chemistry |
| Ram | 60 | 75 | 70 |
| Krish | 82 | 45 | 76 |
Target Data:
Below is the normalized output from the Normalizer transformation
| Student Name | Subject | Marks |
| Ram | Maths | 60 |
| Ram | Physics | 75 |
| Ram | Chemistry | 70 |
| Krish | Maths | 82 |
| Krish | Physics | 45 |
| Krish | Chemistry | 76 |
2. Normalizer Properties
When you configure a Normalizer transformation, you define Normalizer properties on the following tabs of the Properties panel:
- Normalized Fields tab: Define the multiple-occurring fields and specify additional fields that you want to use in the mapping.
- Field Mapping tab: Connect the incoming fields to the normalized fields.
3. Normalized Fields in Normalizer transformation
Under Normalized Fields tab, create fields that are expected as output from Normalizer transformation either by Selecting from Incoming Fields or by creating New Field manually.
Once fields are defined, you need to specify the occurrence of the fields in the input. In our example, marks details are the multiple-occurring data. Hence create a field named Marks and set the Occurs value to 3. You can select the Student_Name field from the Incoming Fields and set the Occurs value to 1. Define the fields as shown below

Two default fields GeneratedColumnID (GCID) and GeneratedKey (GK) are created under Normalized Fields tab.
- GeneratedColumnID (GCID): Generates an incremental value starting with 1 for each occurrence of a multiple-occurring data within the row. Resets back to 1 for next row.
- GeneratedKey (GK): Generate a key for each incoming row. The key starts with one and is incremented by one for each processed row. It is an optional field.
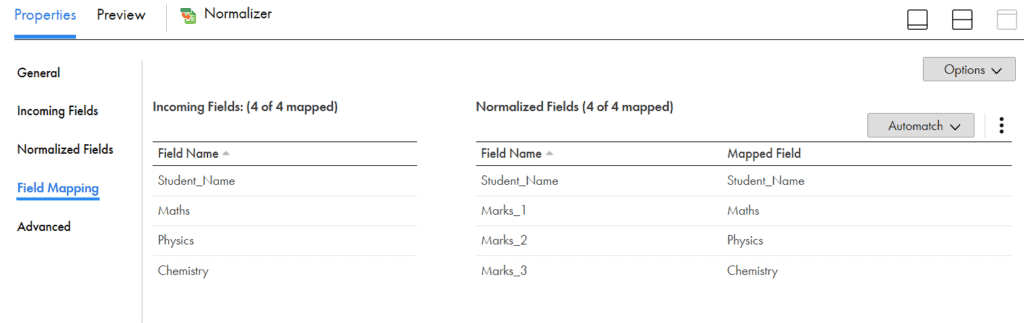
4. Field Mapping in Normalizer transformation
Map Incoming fields to Normalized fields on the Field Mapping tab of the Normalizer transformation.
In our example, as we defined Marks as a multi-occurring field, there will be three fields under Normalized Fields – Marks_1, Marks_2 and Marks_3. Map the fields Maths, Physics and Chemistry to these fields respectively as shown below.
In the example discussed, the output of the Normalizer transformation would be three rows for each input row processed by it.
5. Adding additional fields to Normalized output
In the example we discussed, we have converted student marks details into individual rows but we haven’t assigned the Subject name for each row.
In order to achieve that add an expression transformation after Normalizer. Create a new field Subject of type string and assign the value as below.
Decode(True,
GCID_Marks=1, 'Maths',
GCID_Marks=2, 'Physics',
GCID_Marks=3, 'Chemistry',
NULL)
6. Normalized output with GCID and GK values
The final output from Normalizer with GK and GCID values.
| Student Name | Subject | Marks | GK_Marks | GCID_Marks |
| Ram | Maths | 60 | 1 | 1 |
| Ram | Physics | 75 | 2 | 2 |
| Ram | Chemistry | 70 | 3 | 3 |
| Krish | Maths | 82 | 4 | 1 |
| Krish | Physics | 45 | 5 | 2 |
| Krish | Chemistry | 76 | 6 | 3 |


0 Comments